No edit summary Tag: 2017 source edit |
No edit summary Tag: 2017 source edit |
||
| (19 intermediate revisions by the same user not shown) | |||
| Line 1: | Line 1: | ||
[[File:1 upload wizard.jpg| | The following screen-shots show the process for selecting the 'upload wizard' then adding images to your page gallery.Notes are in pink text. | ||
[[File:2 upload wizard 2.jpg| | Go to the '''Upload wizard''' in the left hand pane. | ||
[[File: | * Follow the sequence of instructions. | ||
* Fill in the release-rights and image description. | |||
* '''It is advised to leave 'categories' blank, otherwise the category will have to display all of your images. ''' | |||
* On the final page, "Thanks for Uploading" you can copy the file names displayed and more quickly use the files just loaded. | |||
<br /> | |||
[[File:1 upload wizard.jpg|400x400px]] | |||
<br /> | |||
<br /> | |||
[[File:2 upload wizard 2.jpg|left|frame]] | |||
<br /> | |||
<br /> | |||
[[File:3_Bulk.jpg|left|frame]] | |||
<br /> | |||
<br /> | |||
[[File:4 Bulk.jpg|left|frame]] | |||
<br /> | |||
<br /> | |||
[[File:5 upload wizard 2.jpg|left|frame]] | |||
<br /> | |||
<br /> | |||
[[File:6 Bulk.jpg|left|frame]] | |||
<br /> | |||
<br /> | |||
[[File:7 Bulk.jpg|left|frame]] | |||
<br /> | |||
<br /> | |||
[[File:8 Bulk.jpg]] | |||
<br /> | |||
<br /> | |||
=== Now go to your project page and add a gallery, or edit one already in place. === | |||
If you need a file which is in the system, go to the [[Special:ListFiles]] | |||
<br /> | |||
<br /> | |||
[[File:9 Bulk.jpg|left|frame]] | |||
<br /> | |||
<br /> | |||
[[File:10 Bulk.jpg|left|frame]] | |||
<br /> | |||
<br /> | |||
[[File:11 Bulk.jpg|left|frame]] | |||
<br /> | |||
<br /> | |||
[[File:12 Bulk.jpg|left|frame]] | |||
<br /> | |||
<br /> | |||
[[File:13 Bulk.jpg|left|frame]] | |||
<br /> | |||
<br /> | |||
[[File:14 Bulk.jpg|left|frame]] | |||
Latest revision as of 15:29, 21 April 2020
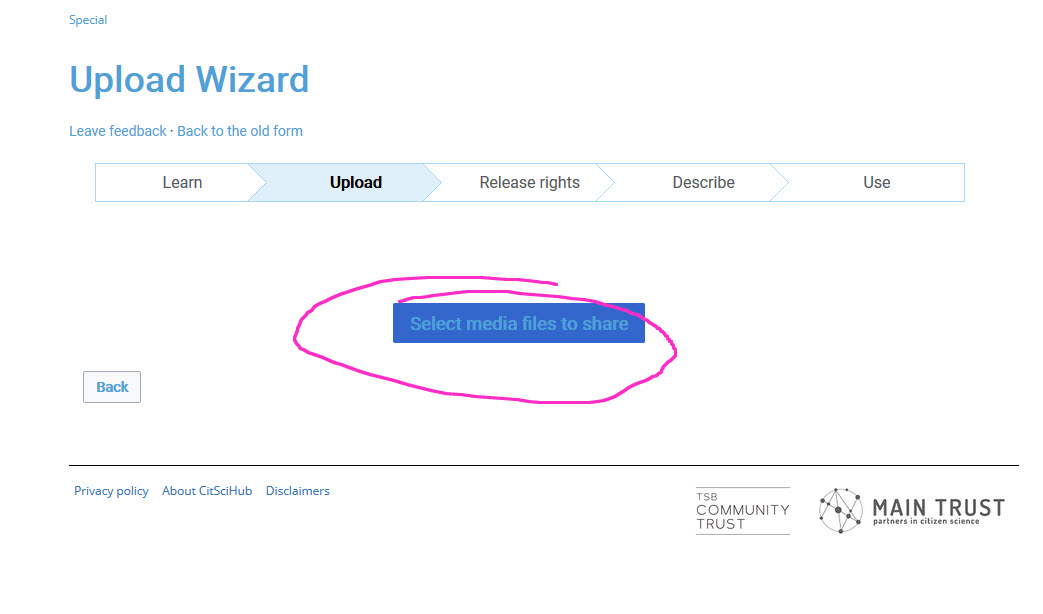
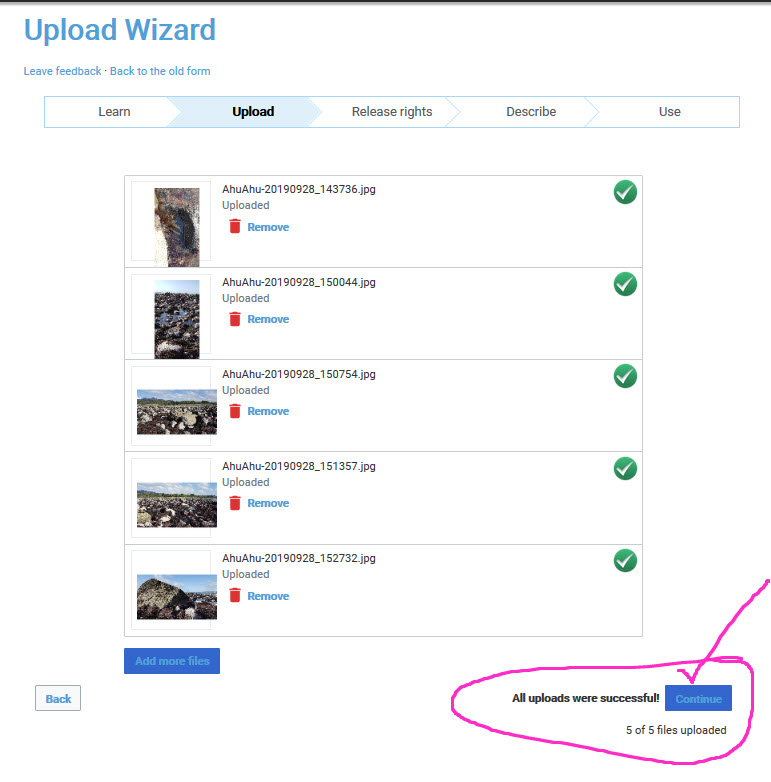
The following screen-shots show the process for selecting the 'upload wizard' then adding images to your page gallery.Notes are in pink text. Go to the Upload wizard in the left hand pane.
- Follow the sequence of instructions.
- Fill in the release-rights and image description.
- It is advised to leave 'categories' blank, otherwise the category will have to display all of your images.
- On the final page, "Thanks for Uploading" you can copy the file names displayed and more quickly use the files just loaded.
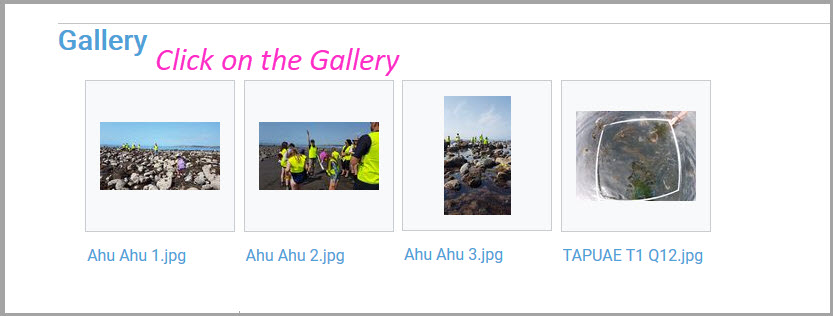
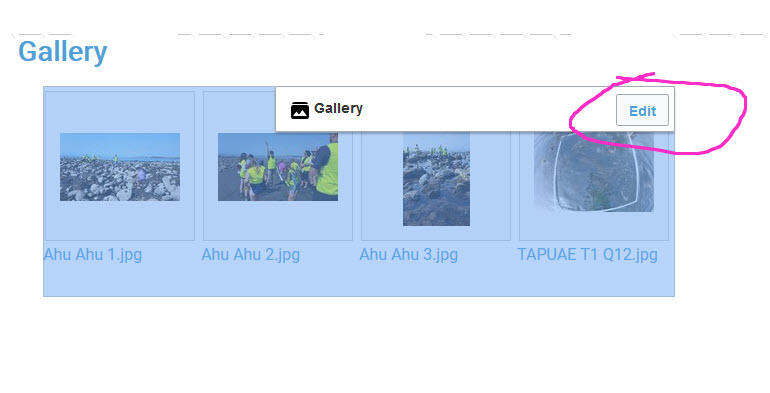
Now go to your project page and add a gallery, or edit one already in place.
If you need a file which is in the system, go to the Special:ListFiles


